
Quickstart
From an empty workspace to your first cited answer in about ten minutes.
This walkthrough takes you from a fresh workspace to a real, cited answer in about ten minutes. It assumes you've already created your workspace. You don't need any integrations to finish it, but connecting Slack along the way is the single most effective thing you can do to keep Docpipe useful over time, so it's included below.
1. Create a space and a document
Docpipe needs some knowledge before it can answer questions, so start by adding a document.
- From the workspace, select Create New Space, name it (for example,
Engineering), and select Create space. - Inside the space, select New Document to open the document gallery.
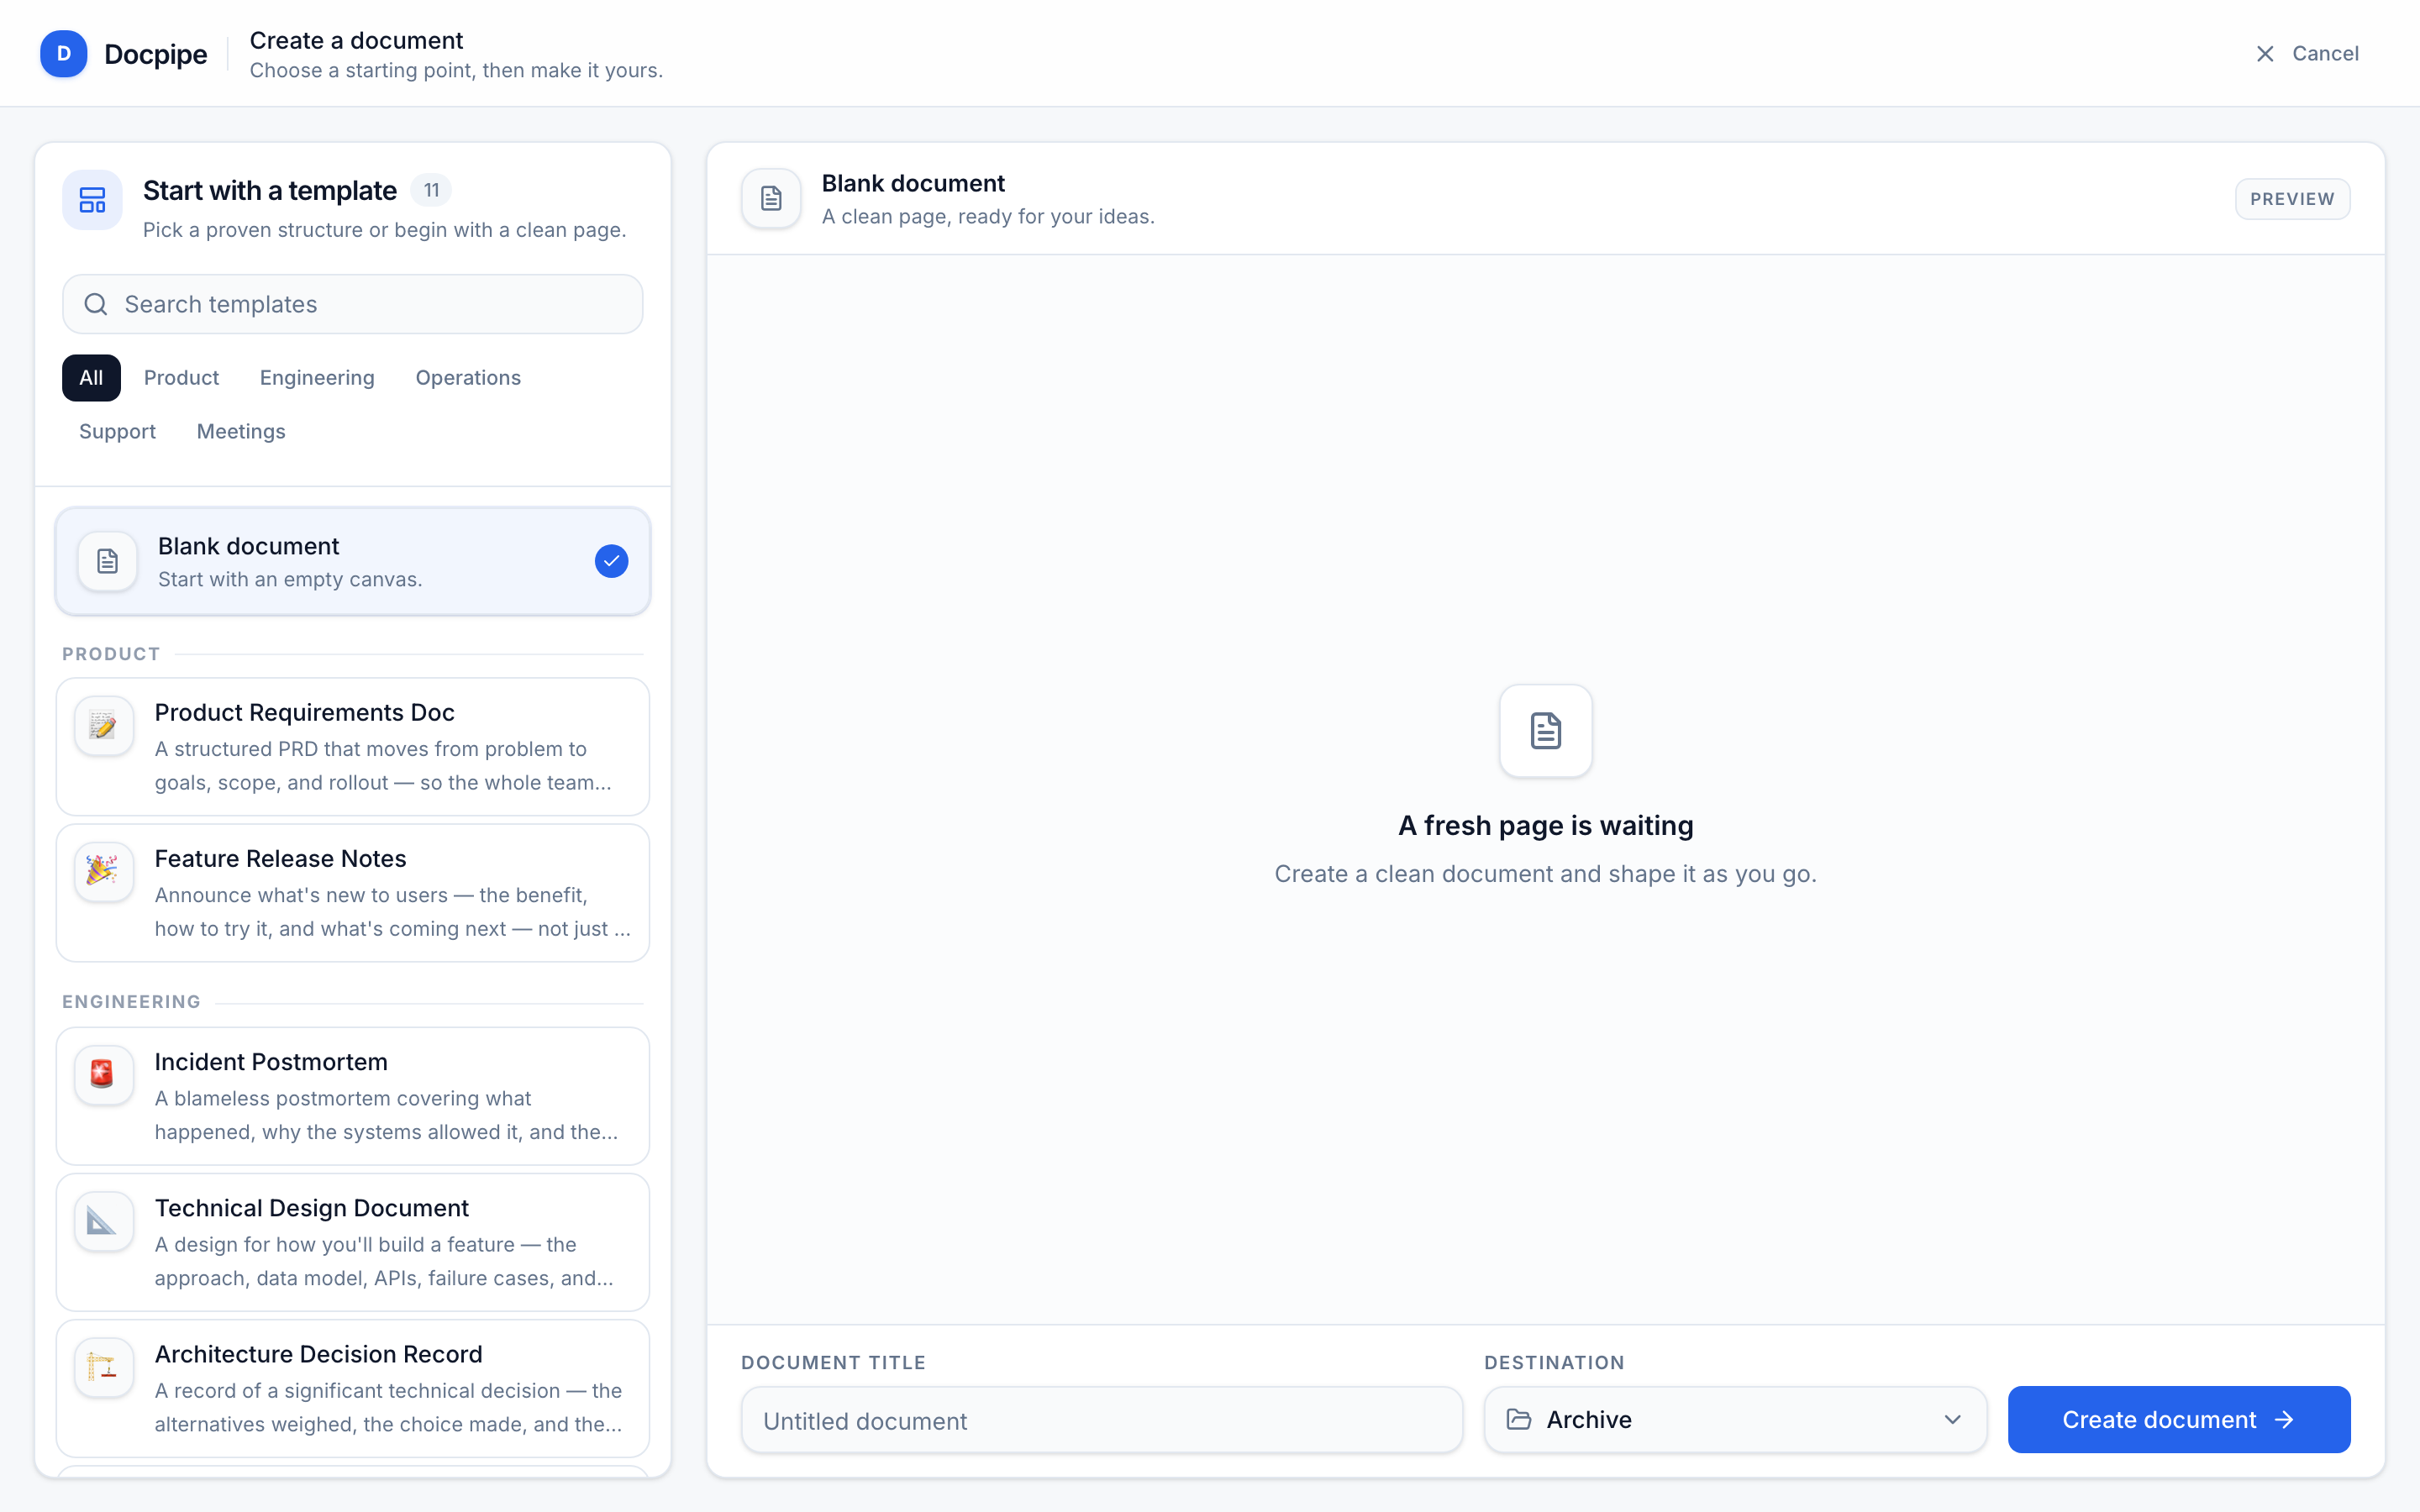
- Choose Blank document, or pick a template (product specs, runbooks, postmortems, onboarding guides, and more). Enter a Document title, choose a Destination, and select Create document.
- Write a few sentences your team would actually ask about — a decision, a process, or an answer you've explained before.
2. Capture from Slack
Connecting Slack is the highest-impact step in this guide. It's how most teams keep Docpipe current without extra work, because knowledge gets captured right where decisions happen. If you haven't connected it yet, do it now — see Capture from Slack.
Once Slack is connected, you can add knowledge without opening the app. In any channel, or in a DM to the bot, type:
/docpipe We deploy to production on Tuesdays and Thursdays only.Docpipe replies "On it — Docpipe is processing your message…", detects that this is documentation rather than a question, and drafts a proposal. Approve it from the review inbox and it joins your knowledge base. See Reviewing proposals.
You can also capture by voice — record a voice note from the top bar.
3. Ask a question and get a cited answer
Now put the knowledge to work.
- Select AI Assistant in the top bar.
- Set the scope to All documents to search your whole knowledge base, or leave it on This document to stay focused on the open page.
- Ask in plain language — for example, "When do we deploy to production?"
Docpipe answers from your documents and cites its Sources, so you can open the exact page behind the answer. If your docs can't support an answer, Docpipe tells you rather than guessing.
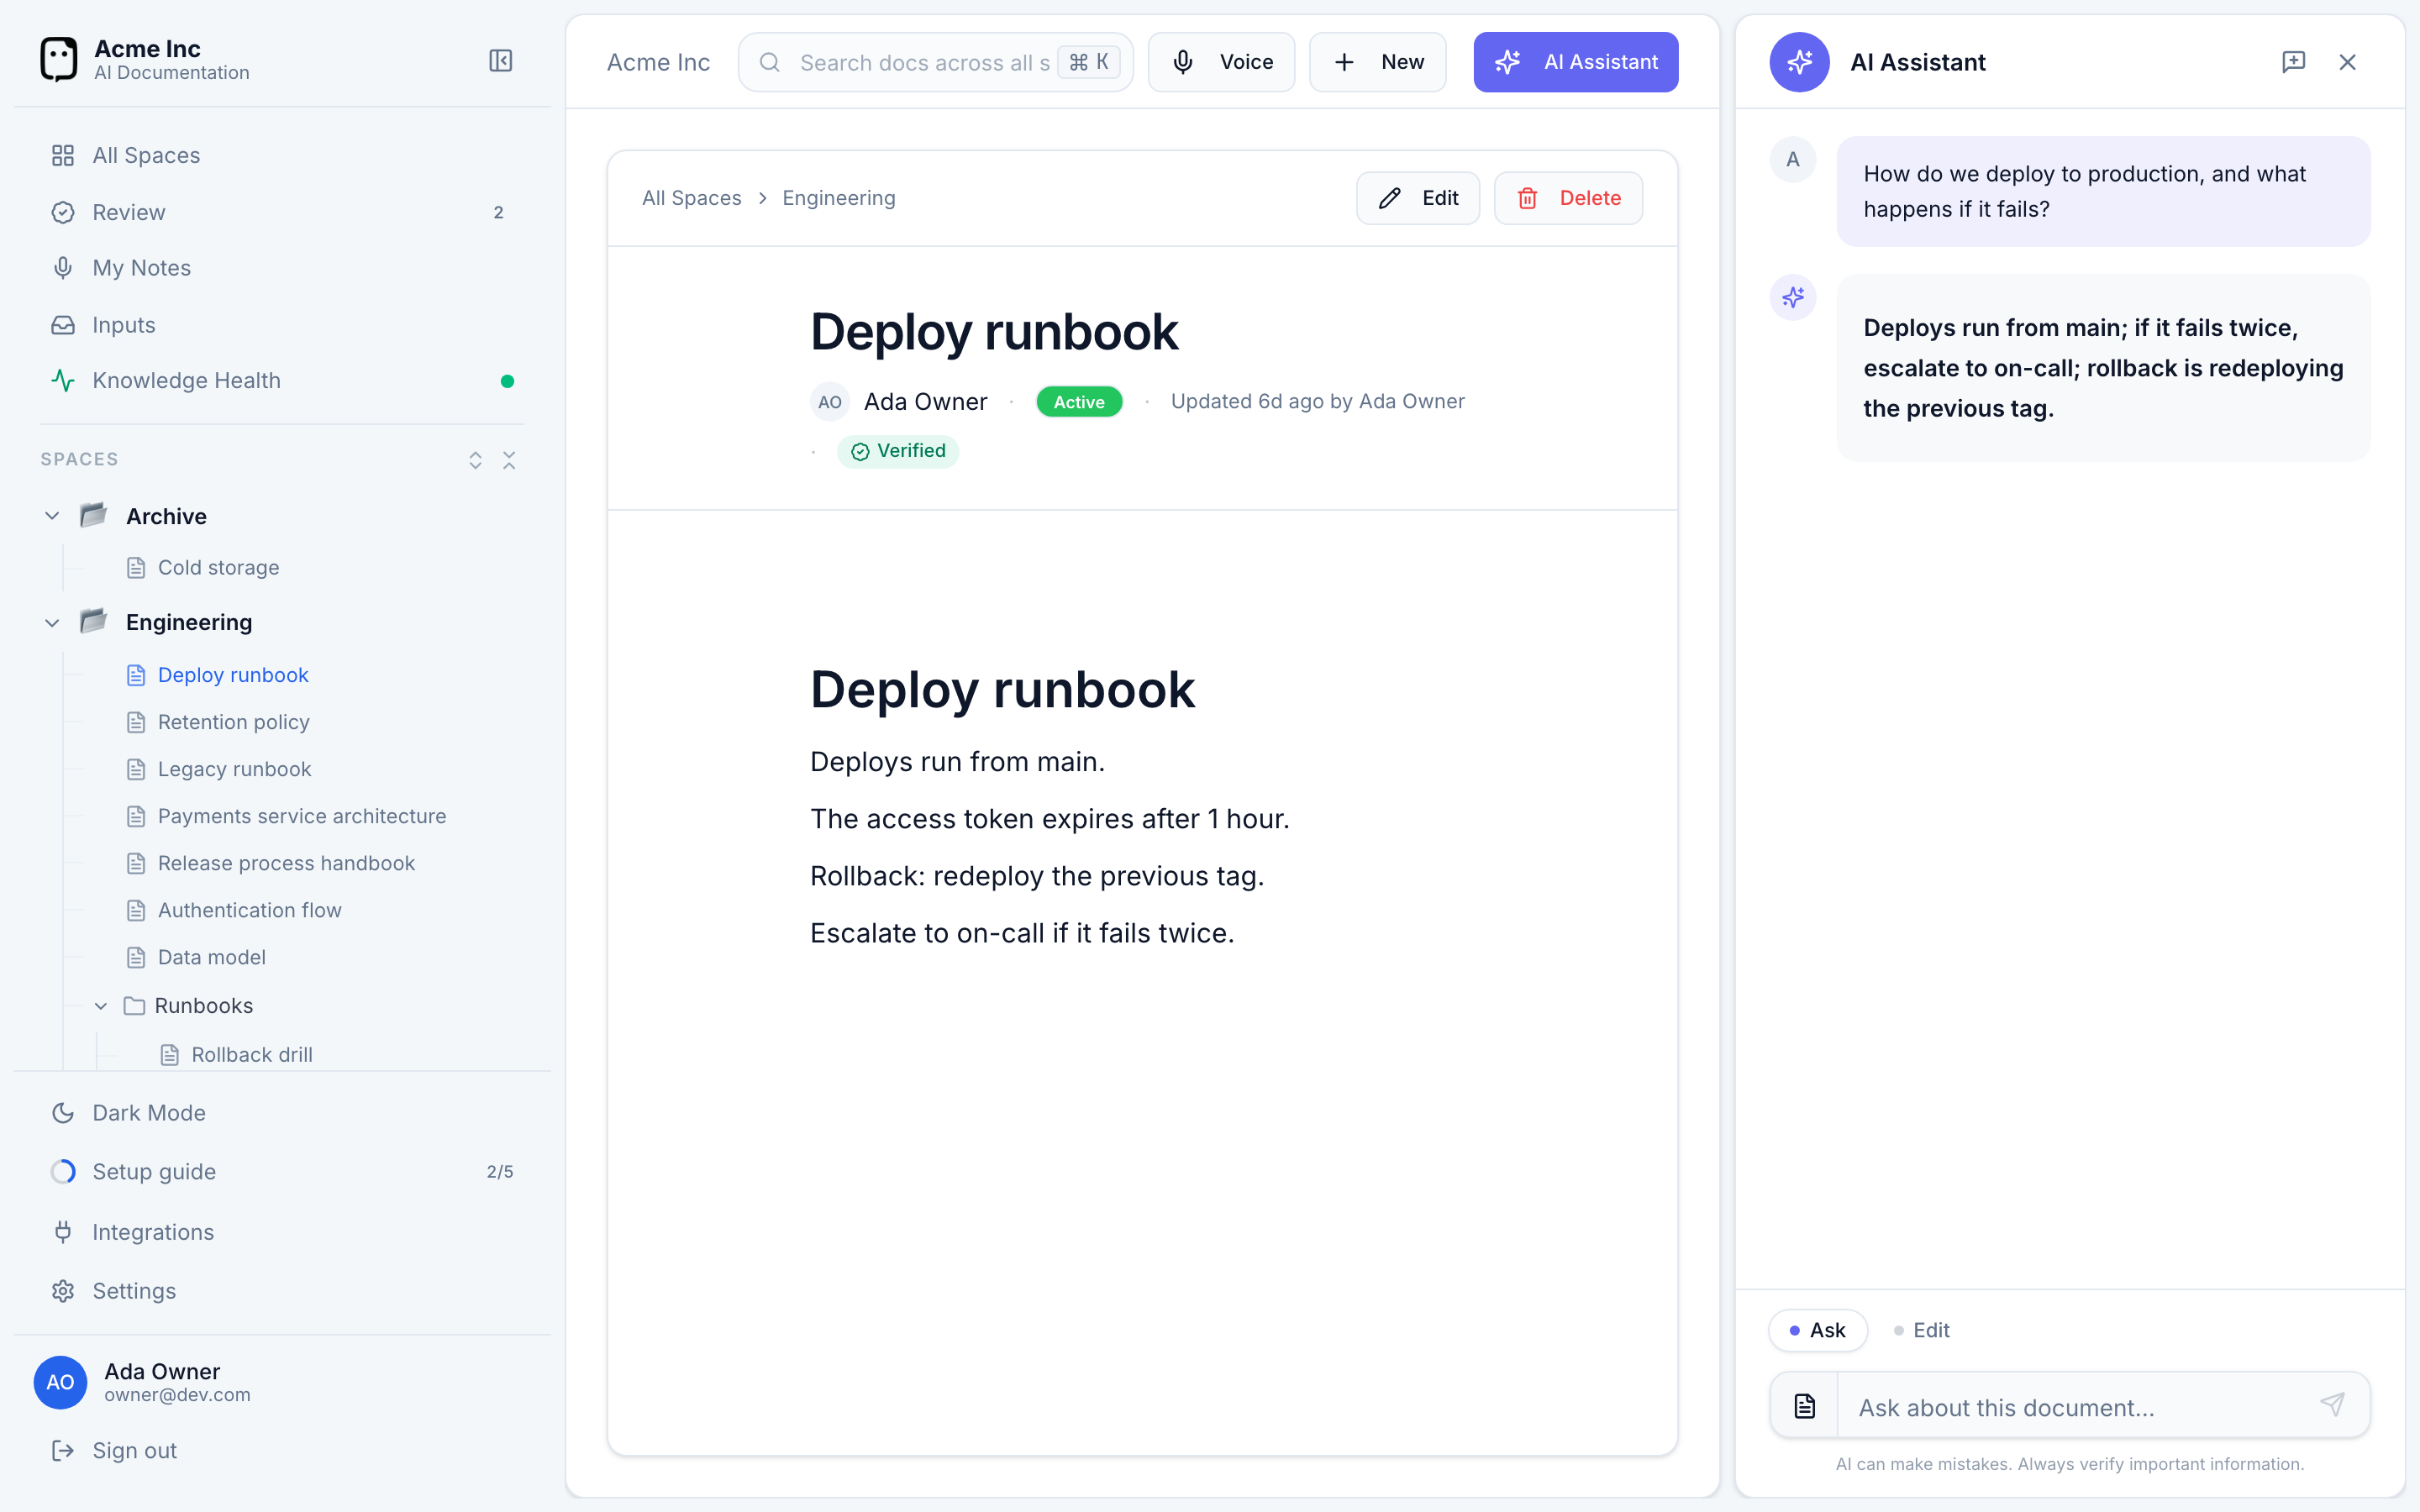
To find and open a document instead of getting a written answer, press ⌘ K (or Ctrl K) to search. Search jumps you to documents; the AI Assistant writes cited answers.
4. Bring in your team and your tools
You now have the full loop working. To get lasting value from it, finish your setup:
- Invite your team so knowledge and answers are shared — the more people in the workspace, the more it captures and the more it's used.
- Connect integrations — Slack for capture and answers, GitHub for code-aware docs, and Confluence to import documentation you already have.
- Review core concepts so your team shares the same vocabulary.
Your progress on these is tracked in the Setup guide in the sidebar.