
Create Your Workspace
Sign in, create or join an organization, and complete first-run setup.
Your workspace — called an organization in Docpipe — holds your documentation, spaces, and integrations. This article covers signing in, creating or joining an organization, and completing first-run setup.
Sign in
Go to app.docpipe.co and select Continue with Google. If your team has email sign-in enabled, email and password fields appear as well; otherwise Google is the only option.
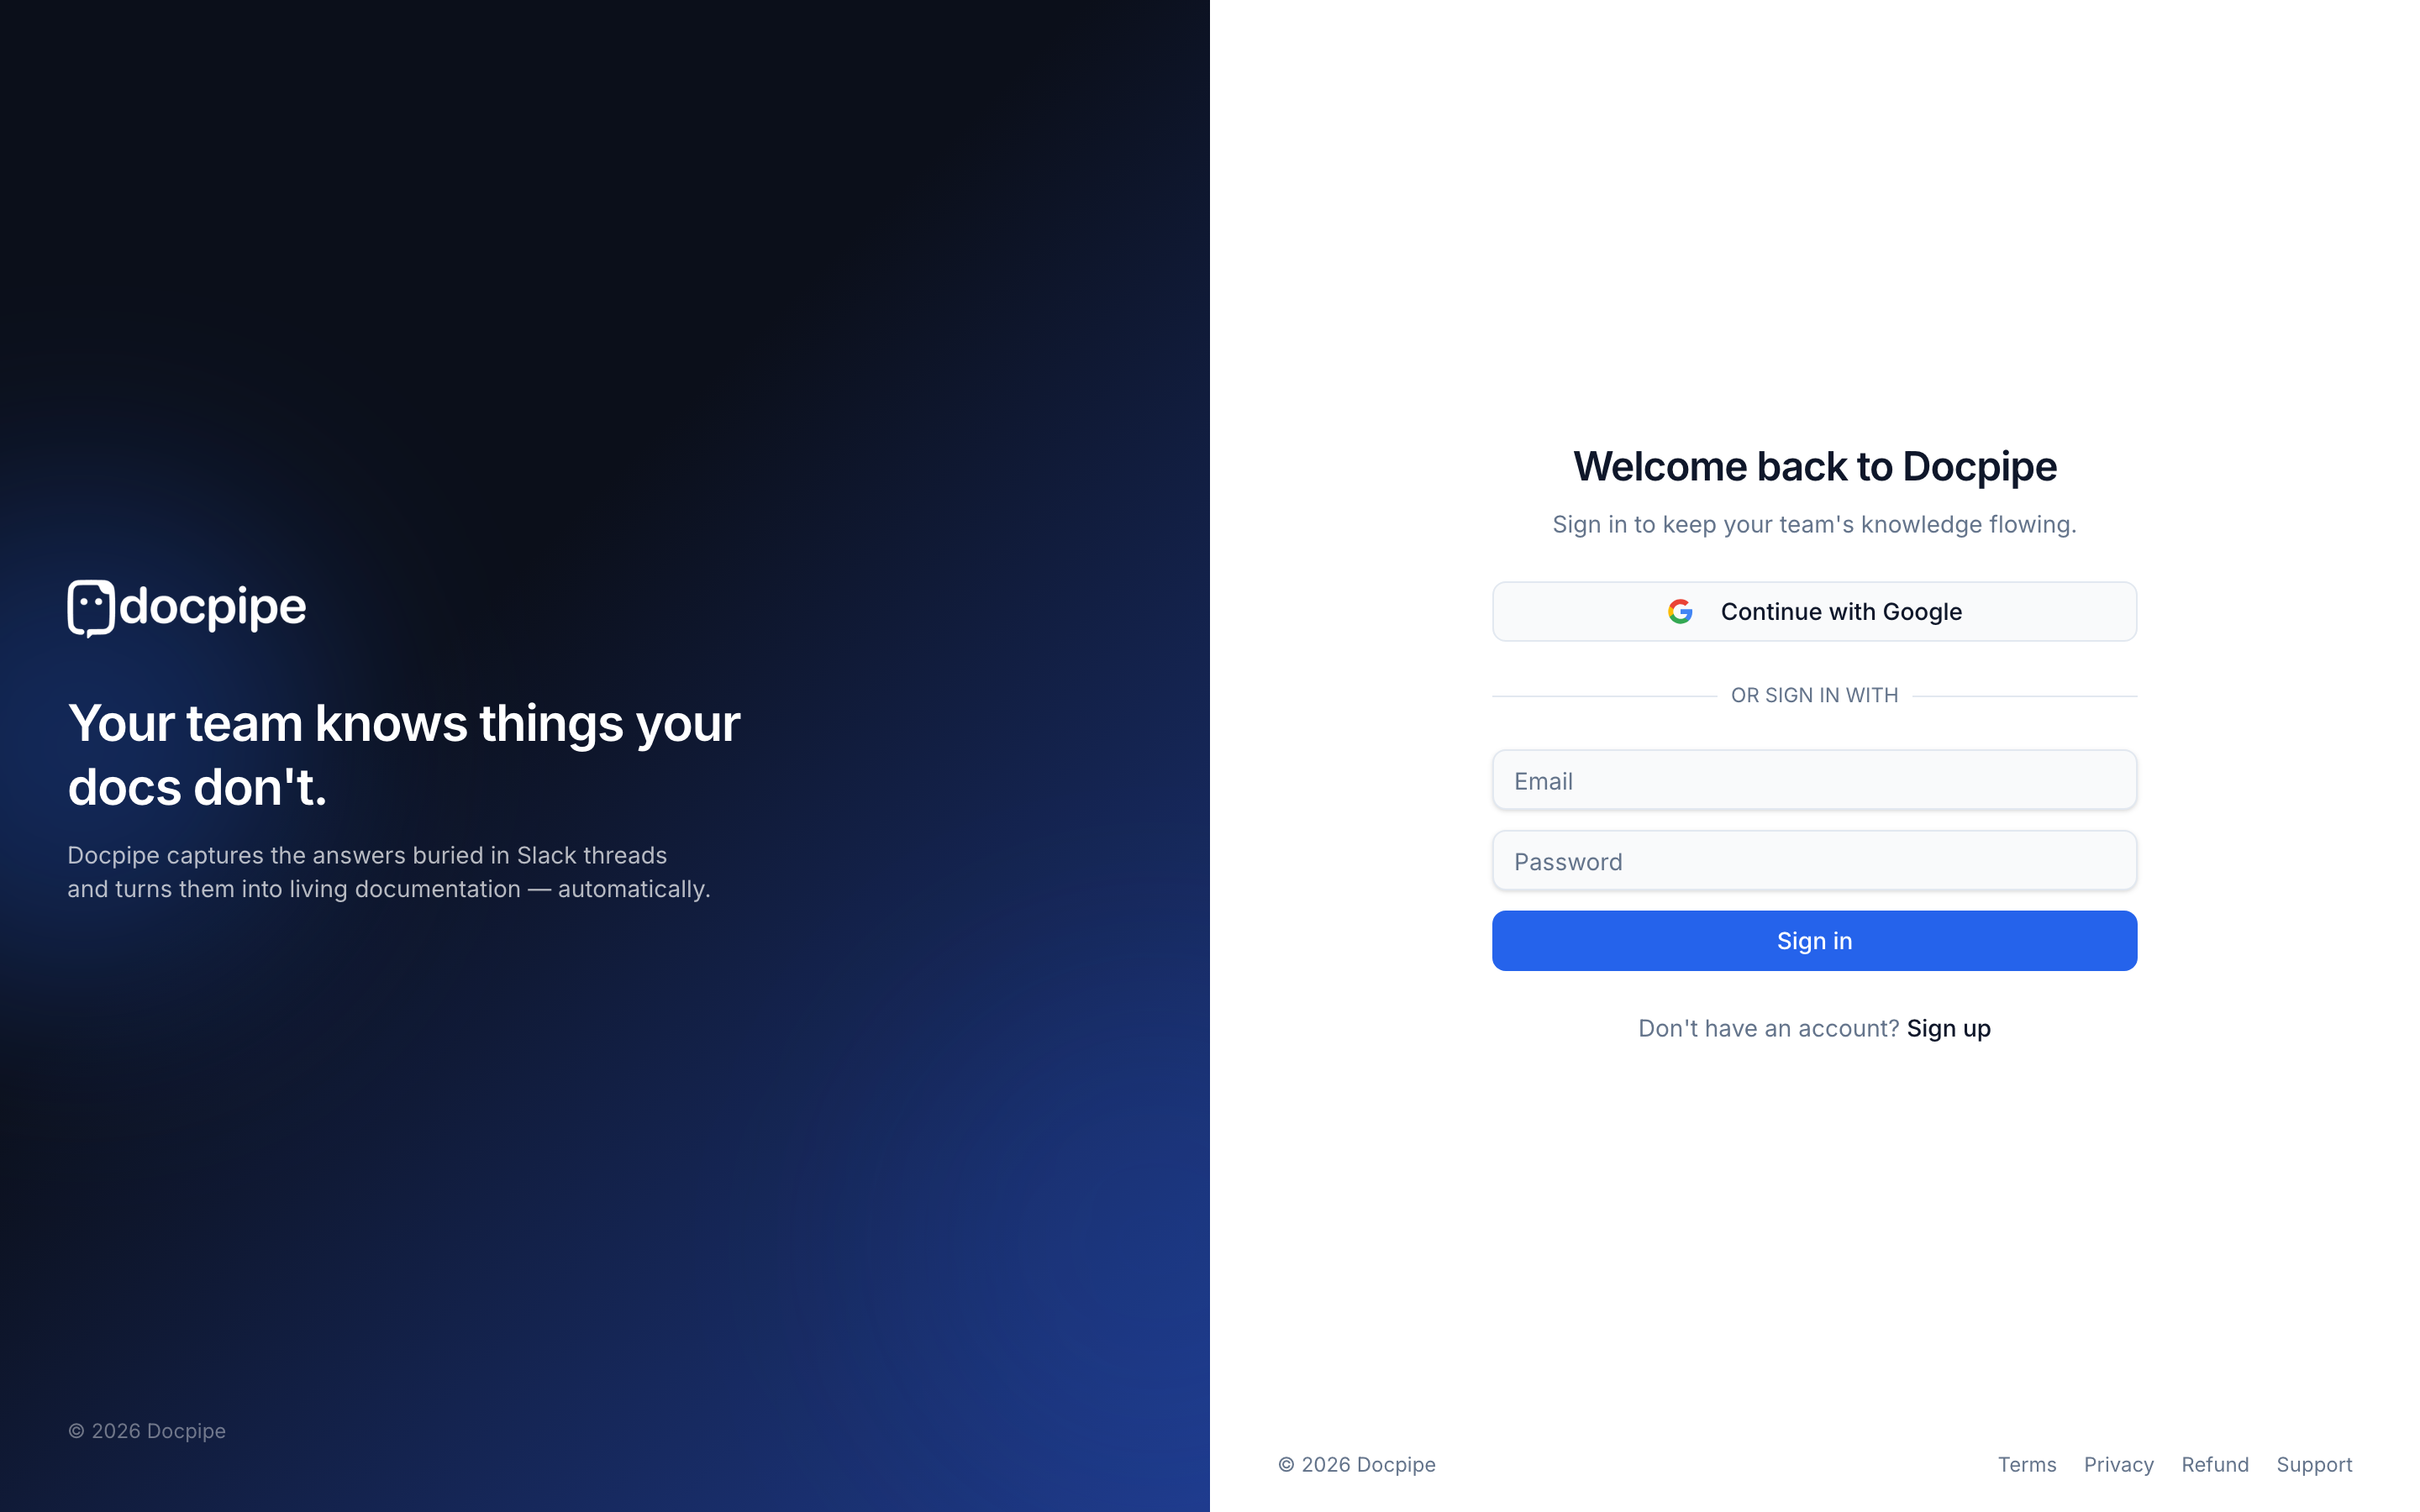
The first time you sign in, Docpipe creates your account and takes you to set up an organization.
Create or join an organization
What you see next depends on whether Docpipe can already match you to a team:
- You have a pending invitation, or your email domain matches an existing workspace. Docpipe shows the Join your team screen. Select Accept & join on an invitation to join immediately, or Request to join on a domain match and wait for an admin to approve you.
- No match yet. Docpipe takes you straight to the Create your organization form.
To start a new organization instead of joining, select Create your own organization.

Fill in the create form
The Create your organization form has three fields:
- Organization name — your team or company name (for example,
Acme Inc). - Workspace URL — the address your team will use, shown as
app.docpipe.co/your-slug. Docpipe fills this in from the name; edit it if you like. It must be unique. - Email domain — your company domain (for example,
acme.com). Adding it lets teammates with a matching email request to join on their own, so you don't have to invite everyone by hand. We recommend setting it now. Personal domains such asgmail.comaren't accepted here.
Select Create organization.
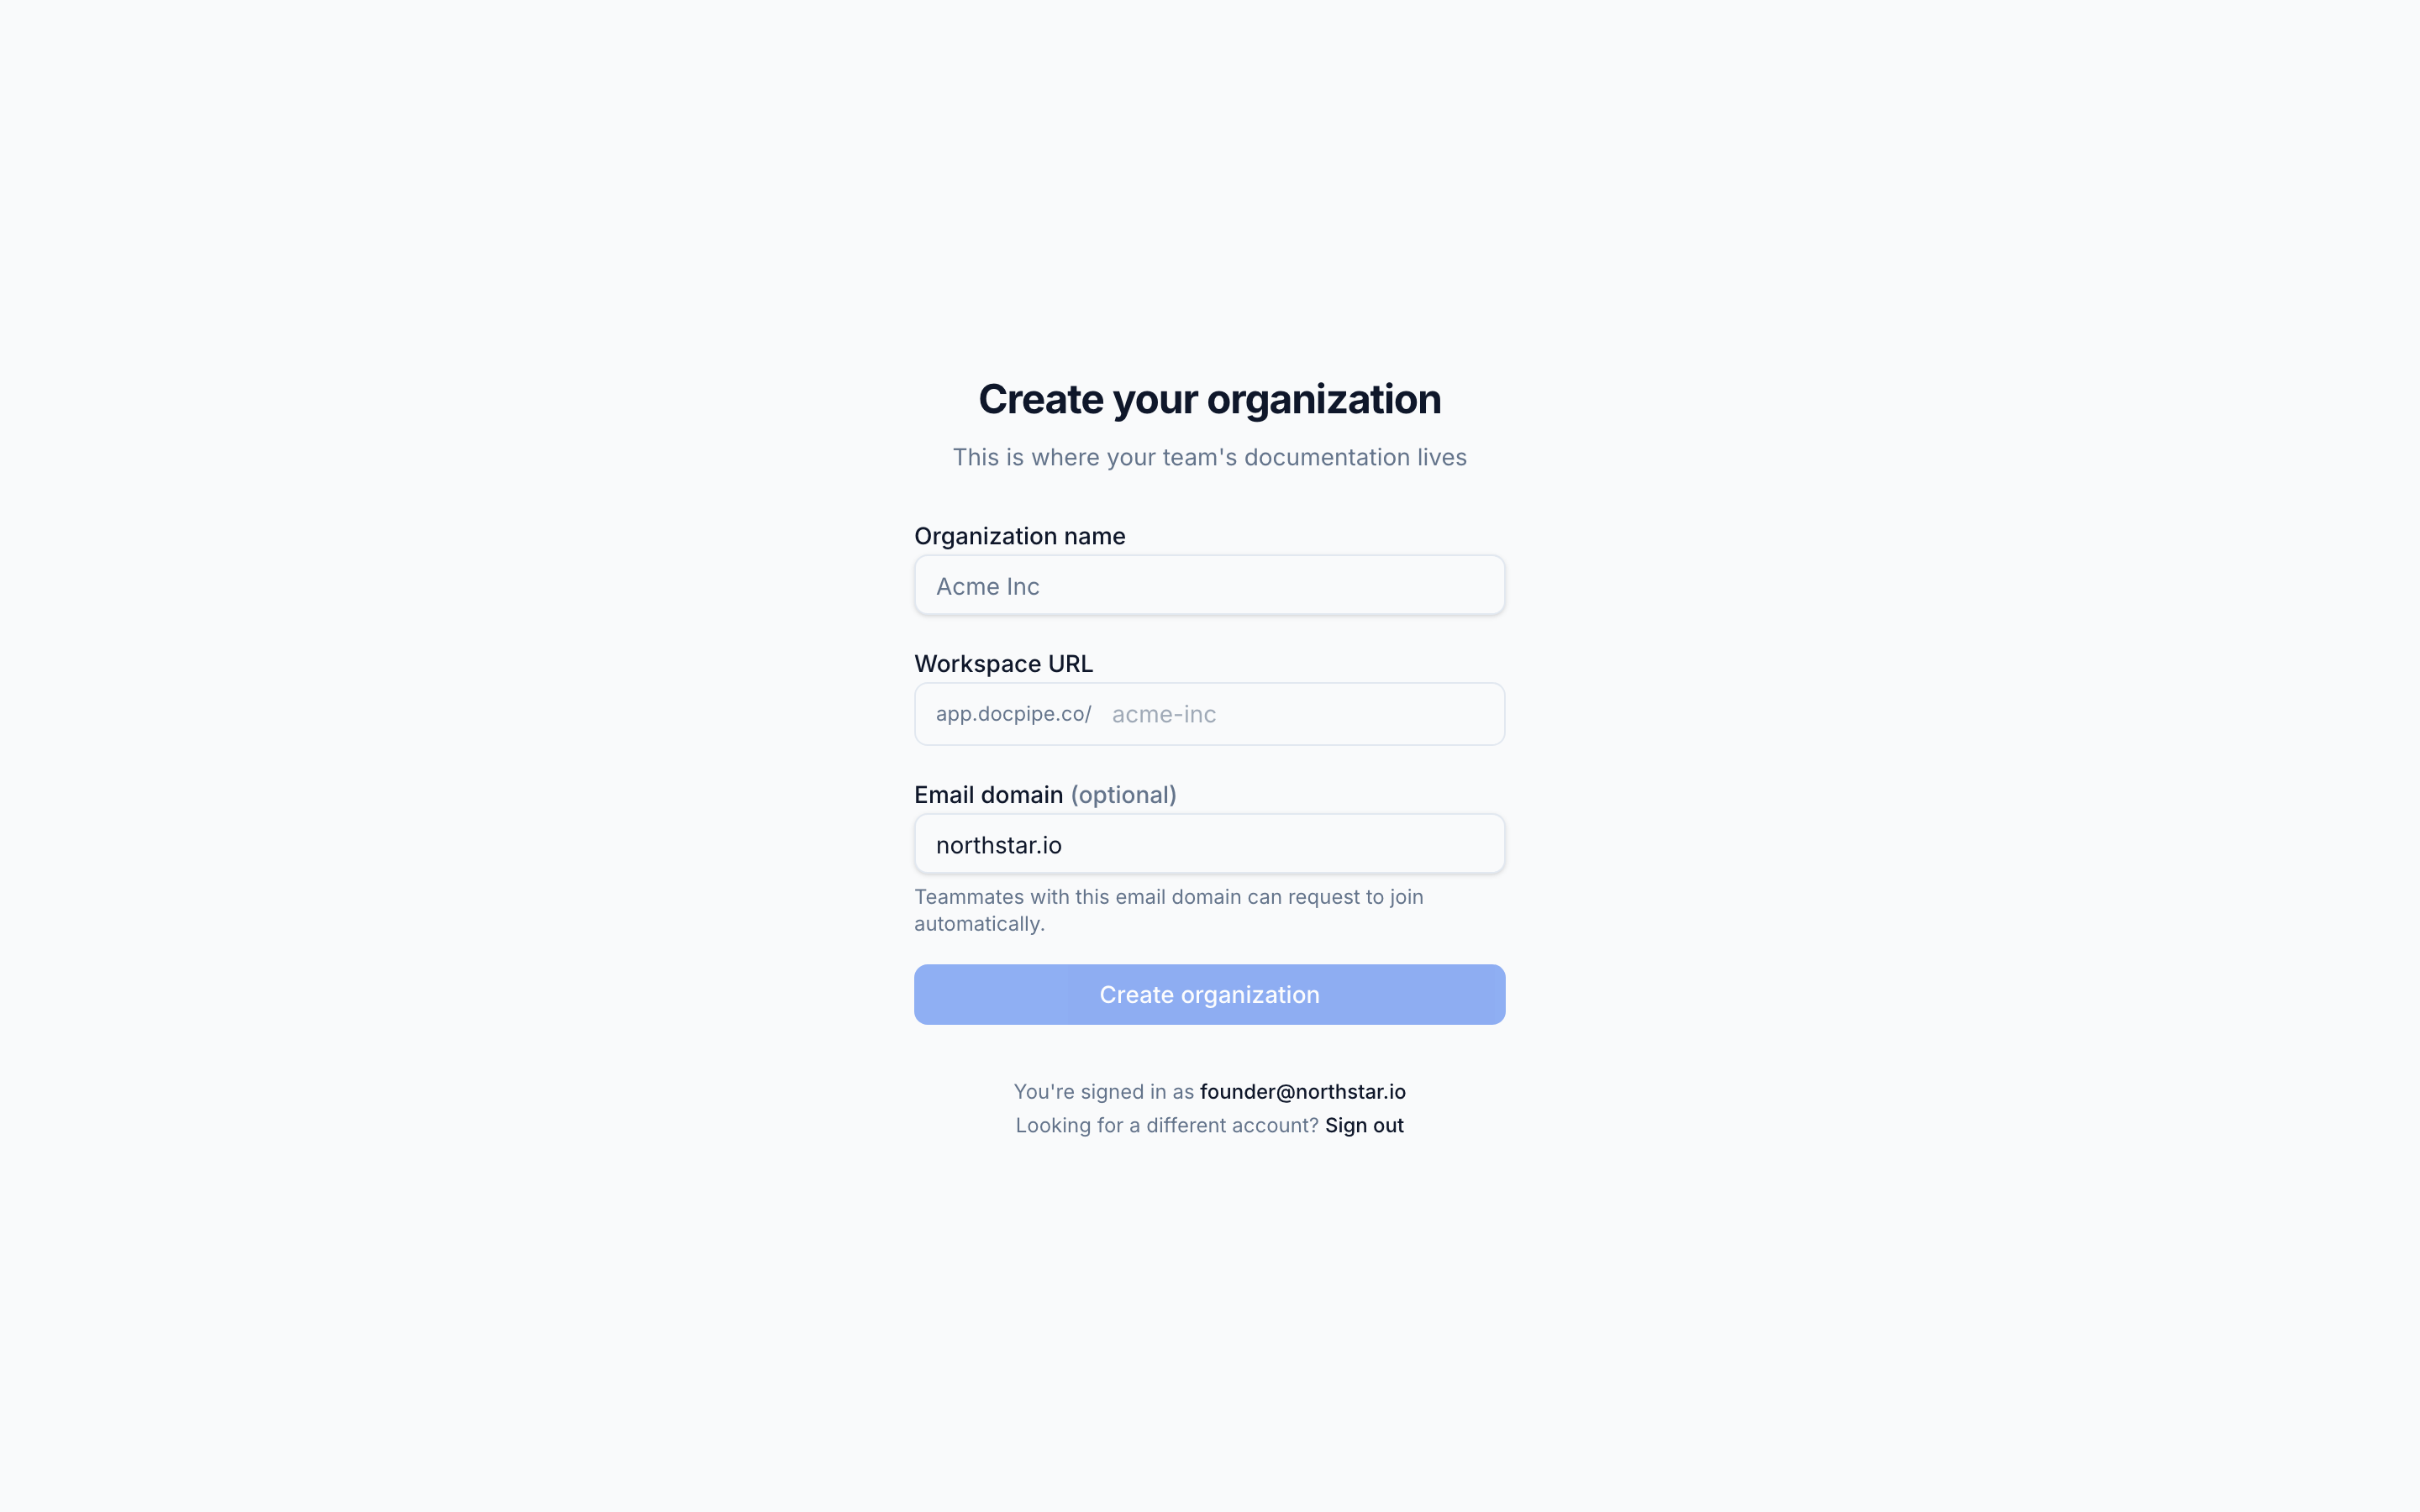
You become the organization's owner, and Docpipe adds two ready-to-use roles: Super Admin and Member. You can create more later — see Roles & privileges.
Complete first-run setup
Docpipe then walks you through a three-step setup wizard. We recommend completing all three steps now. It takes only a few minutes, and it's what gets your team to value on day one. You can finish any step later from the Setup guide, but the sooner these are in place, the sooner Docpipe works for you.
- Connect Slack — link your Slack workspace so your team can capture decisions and get answers with
/docpipe, right where they already work. This is where most knowledge enters Docpipe, so connecting it first has the biggest payoff. See Capture from Slack. - Import documentation — install the GitHub App to index your code, or run a one-time Confluence import. Bringing in what you already have lets the assistant answer from real context immediately, instead of starting from an empty workspace. See Integrations.
- Invite your team — add teammates by email and assign each a role. Docpipe pays off fastest when the people who hold knowledge and the people who need it are both in the workspace. See Invite your team.
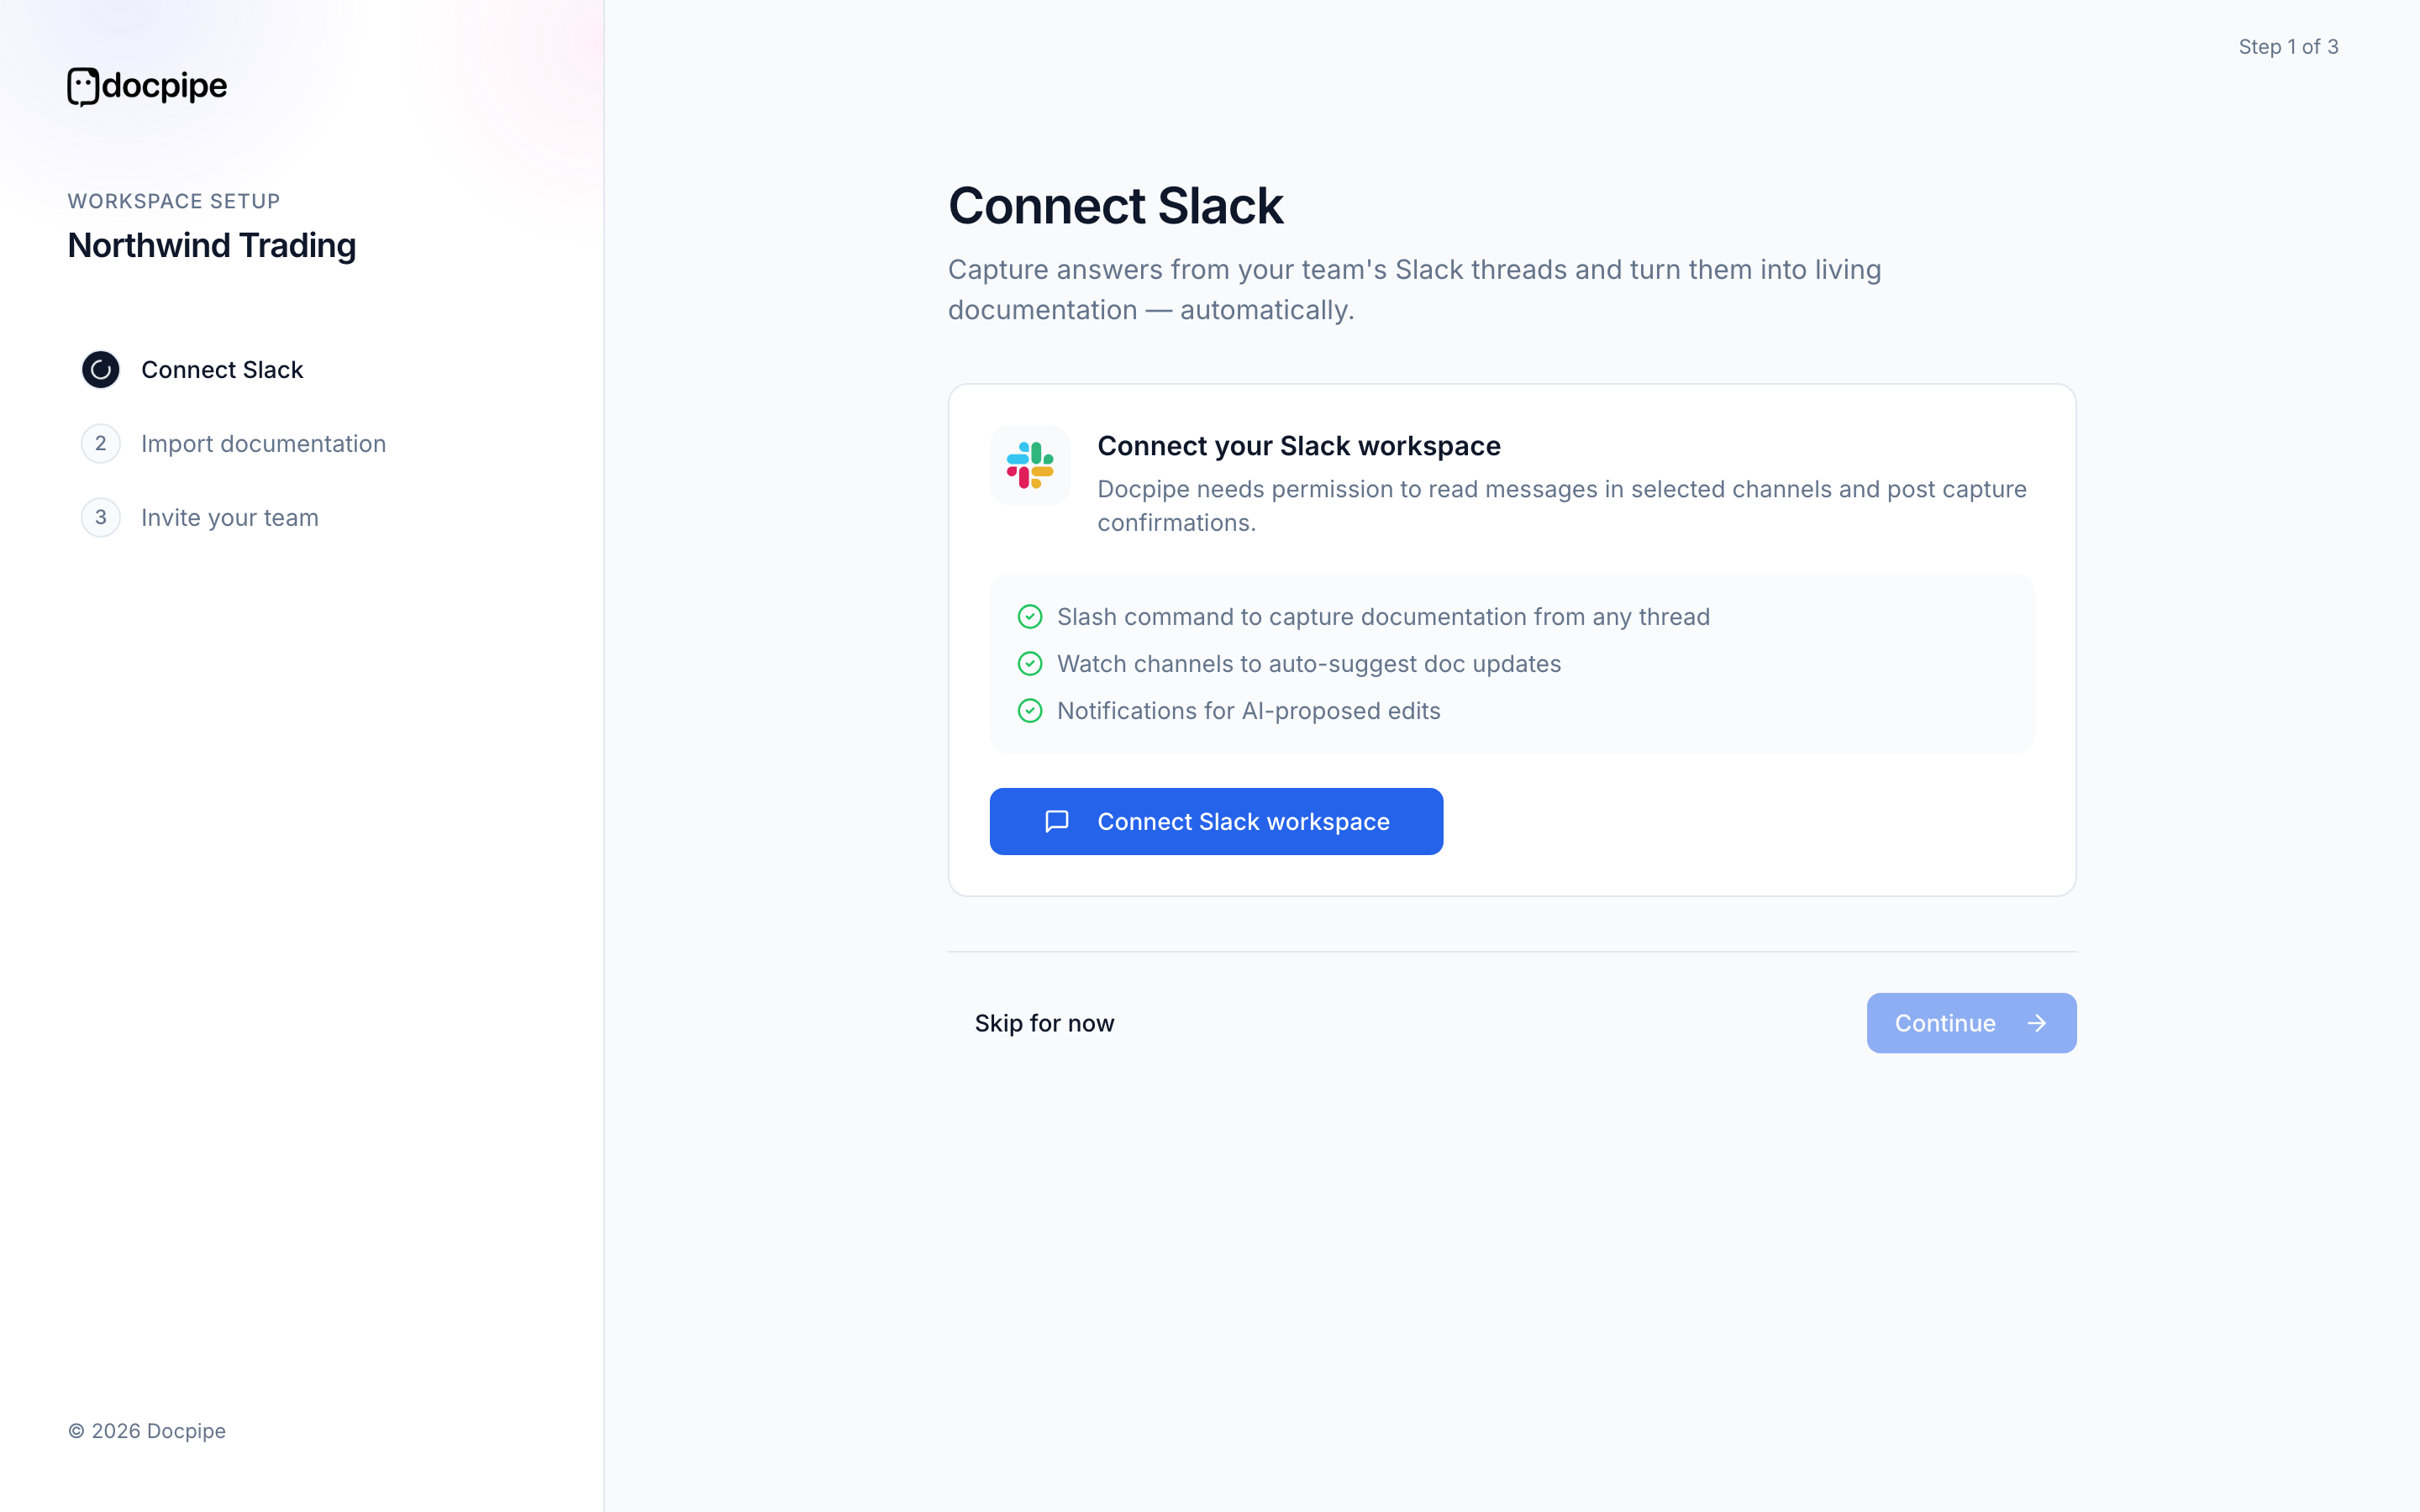
When you finish, your workspace opens with a Setup guide in the sidebar that tracks anything you skipped, so nothing gets lost.
Only the owner sees the first-run wizard. Invited teammates go straight to the workspace when they accept.
Next step
Continue to the Quickstart to capture your first piece of knowledge and get your first cited answer.